Page Contents
- Installation and Uninstallation
- Installation in Logpoint
- Installation in Endpoints
- Uninstallation from Logpoint
- Uninstallation from Endpoints
Important
In a distributed setup, you must install AgentX on all Logpoints, including the Search Head.
To install AgentX Server, AgentX Manager and AgentX KB:
Download the .pak file from the Help Center.
Go to Settings >> System Settings from the navigation bar and click Applications.
Click Import.
Browse to the downloaded .pak file.
Click Upload.
After installing, you can find them under Settings >> System Settings >> Plugins.
The following is a list of the flags to use when installing AgentX Client on Windows or Linux from the command line:
Data Type |
Flag |
DESCRIPTION |
|---|---|---|
String |
MANAGER_ADDRESS |
Use this flag to specify the Logpoint IP address where AgentX is installed. |
String |
INSTALLATION_TYPE |
Use this flag to specify whether to install AgentX Client on a default path or custom. |
String |
INSTALL_DIR |
Use this flag to specify the directory to install AgentX Client. |
String |
ADDLOCAL |
Use this flag to specify whether to install osquery. Set it to “OsqueryFeature” to install it. |
String |
SSL_CERT |
Use this flag to specify the location of custom Certificates. |
String |
SSL_KEY |
Use this flag to specify the location of the SSL certificate key. |
Enum [“Y”,”N”] |
OSQUERY_INSTALL |
Use this flag to specify whether to install osquery. Set it to “Y” to install it and “N” to skip the installation. |
String |
CUSTOM_OSQUERY_CONF |
Use this flag to specify the location of custom OSQUERY. |
Enum [“Y”,”N”] |
VALIDATE_CONF |
Use this flag to validate if the location of custom OSQUERY exists. Set it to “Y” to validate and “N” to skip the validation. |
You can install AgentX Client on a single device or mass install it on multiple devices simultaneously. You must have local administrative permissions for individual installation and domain administrative permissions for mass installations.
AgentX Client can be installed from the command line or the User Interface.
To install AgentX Client from the command line:
Run the command line as an administrator.
Enter the following:
msiexec /i AgentX_Client_windows_version.msi MANAGER_ADDRESS=XX.XX.XX.XX ADDLOCAL=OsqueryFeature /qn
This installs AgentX Client in the default path.
You can provide a custom path by using the following command:
msiexec /i AgentX_Client_windows_version.msi MANAGER_ADDRESS=XX.XX.XX.XX INSTALLATION_TYPE=custom INSTALL_DIR= "AgentX Client location" ADDLOCAL=OsqueryFeature /qn
If the custom path does not exist, the installation fails.
Using the above commands configures OSSEC and osquery by default. You can also use a custom configuration file for osquery by using the following command to install AgentX Client:
msiexec /i AgentX_Client_windows_version.msi MANAGER_ADDRESS=XX.XX.XX.XX INSTALLATION_TYPE=custom INSTALL_DIR= "AgentX Client location" ADDLOCAL=OsqueryFeature CUSTOM_OSQUERY_CONF="OSQUERY configuration location" /qn
If you use custom Certificates, use the following command to install AgentX Client:
msiexec /i AgentX_Client_windows_version.msi MANAGER_ADDRESS=XX.XX.XX.XX INSTALLATION_TYPE=custom INSTALL_DIR="AgentX Client location" ADDLOCAL=OsqueryFeature SSL_CERT="D:\AgentX\shared\sslagent1.cert" SSL_KEY="D:\AgentX\shared\sslagent1.key" /qn
To install AgentX Client from the User Interface:
Download the AgentX file from the Release Notes.
Go to the downloaded file, right-click on it and click Install.
Click Next.
Installing AgentX on Windows
Agree to the terms and conditions and click Next.
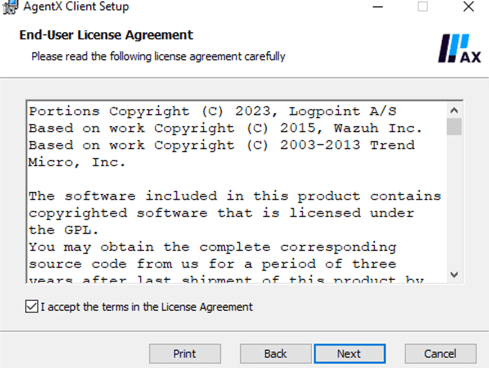
Terms and Conditions
Note
Here, you can disable osquery. Double-click AgentX, click the drop-down and click Entire feature will be unavailable. This prevents access to information about system events, processes and configuration of Windows.
Select an installation path.
5.1. Select Default to install Ossec in C:\Program Files (×86)\ossec-agent and osquery in C:\Program Files\osquery. You can find the installation log in C:\Program Files (x86).
5.2. Select Custom to manually enter an installation path where Ossec, osquery and the installation log will be installed. However, if the custom path does not exist, the installation fails.
If you enter C:\Program Files or its subdirectories as the path, then Ossec will be installed in C:\Program Files (×86)\ossec-agent and osquery and the installation log will be installed in the specified path.
Click Next.
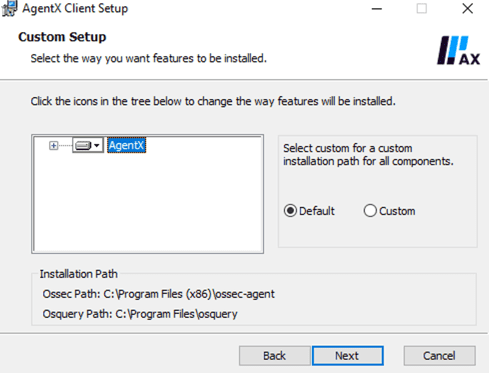
Selecting Installation Path
Enter the IP address of Logpoint where AgentX Server and AgentX Manager are installed. If you install them on a different Logpoint later, change the IP address so it corresponds to the Logpoint where they are installed.
If you are implementing load balancer with AgentX Cluster, enter its IP address instead.
Click Next
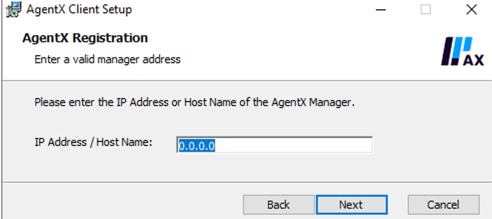
Registering Logpoint AgentX Manager
. Click Install and click Finish.
To change the IP address of Logpoint after the installation:
Go to the AgentX Client installation path.
Click win32ui.
In Manager IP, enter the Logpoint IP address and click Save. To edit the configuration, re-enter the Logpoint IP address in Manager IP, click Save and restart the agent.
Leave Authentication key empty.
Click Manage and Start the agent. You can stop or restart the agent by clicking Stop or Restart.
Click OK and Save.
Prerequisites
Windows 10 Pro and 11 Pro Workstations
AgentX Client v1.2.0 or later. Download it from the Release Notes.
To mass install AgentX Client using Microsoft Intune, you must add some configurations in the Windows workstation and in the Microsoft Intune portal.
Go to the Microsoft Intune Portal and log in.
Go to Windows workstation and download Company Portal.
Log into the Company Portal with the same credentials as Microsoft Intune.
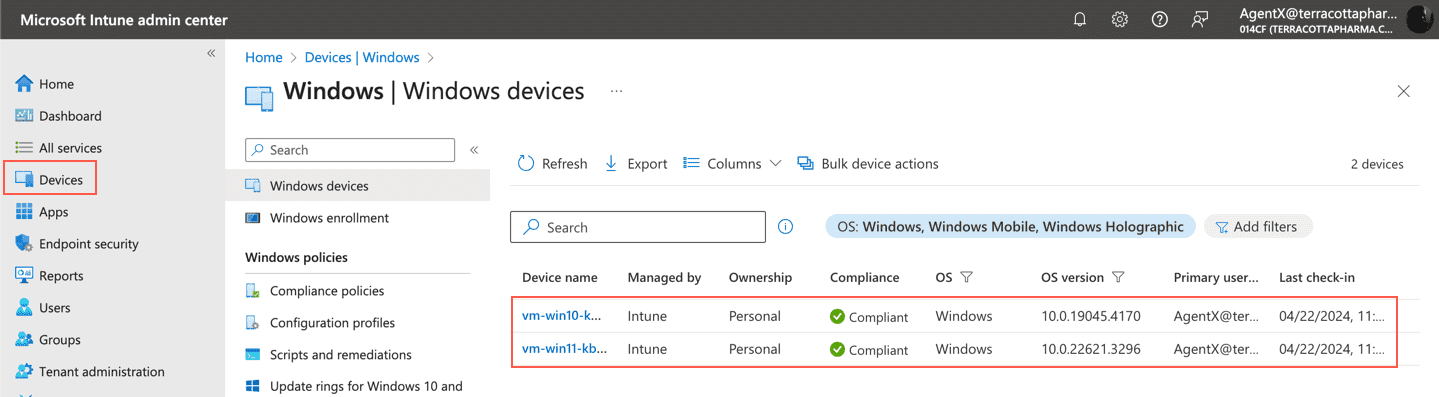
Go back to Microsoft Intune and click Devices.
Click Windows Devices and verify if your device is connected to the Intune account.
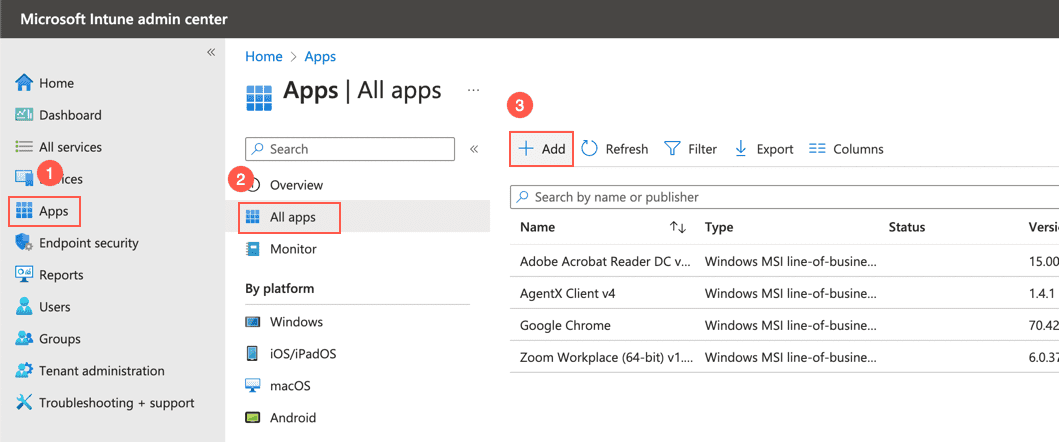
Click Apps.
Click All apps and click + Add.
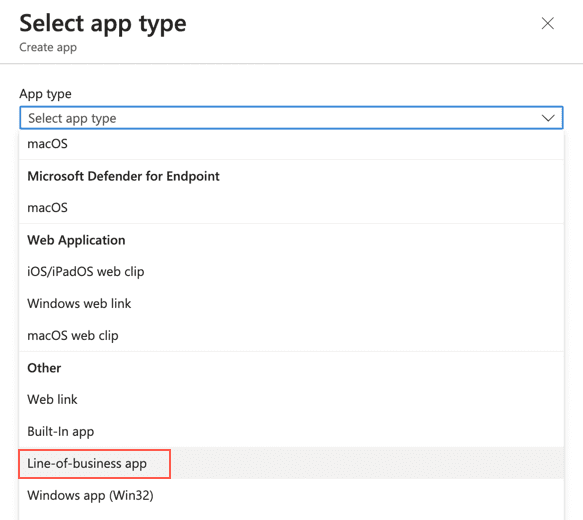
Select Line-of-business app as App type.
Click Select.
Click Select app package file and select the AgentX Client .msi file.
Click OK.

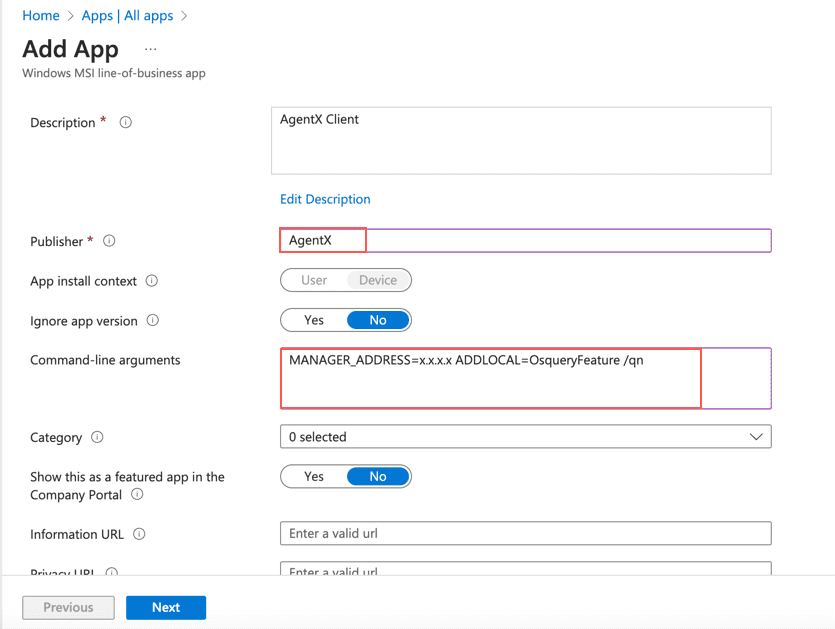
Enter a Publisher name.
In Command-line arguments, enter MANAGER_ADDRESS=x.x.x.x. MANAGER_ADDRESS is the Logpoint IP address where AgentX is installed.
To enable osquery of AgentX with the installation, enter MANAGER_ADDRESS=x.x.x.x ADDLOCAL=OsqueryFeature /qn.
Click Next.
Under Required, click + Add group.
Select your company group to install AgentX Client and click Select.
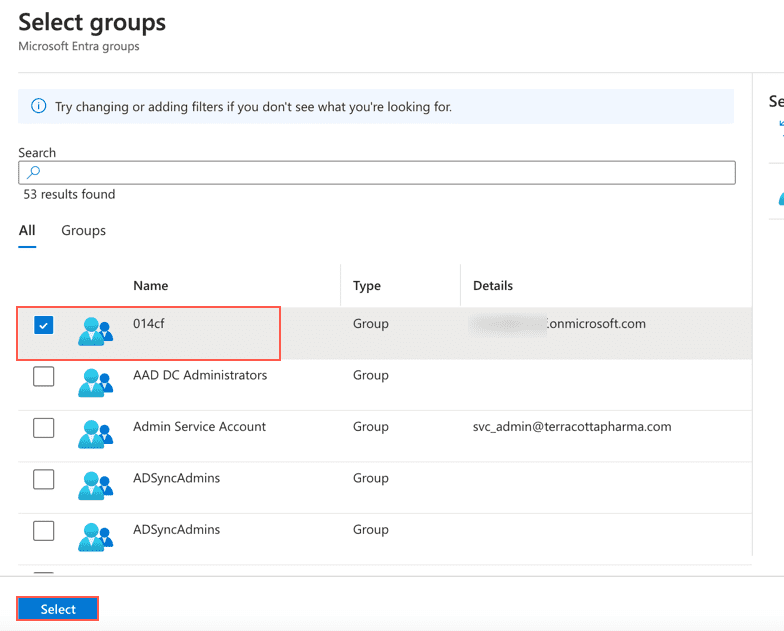
Click Next.
Click Create.
To ensure if the installation was applied to the network:
Go to Settings on your Windows workstation and click Accounts.
Click Access work or school.
Select the Microsoft Intune account your Windows workstation is connected to and click Info.
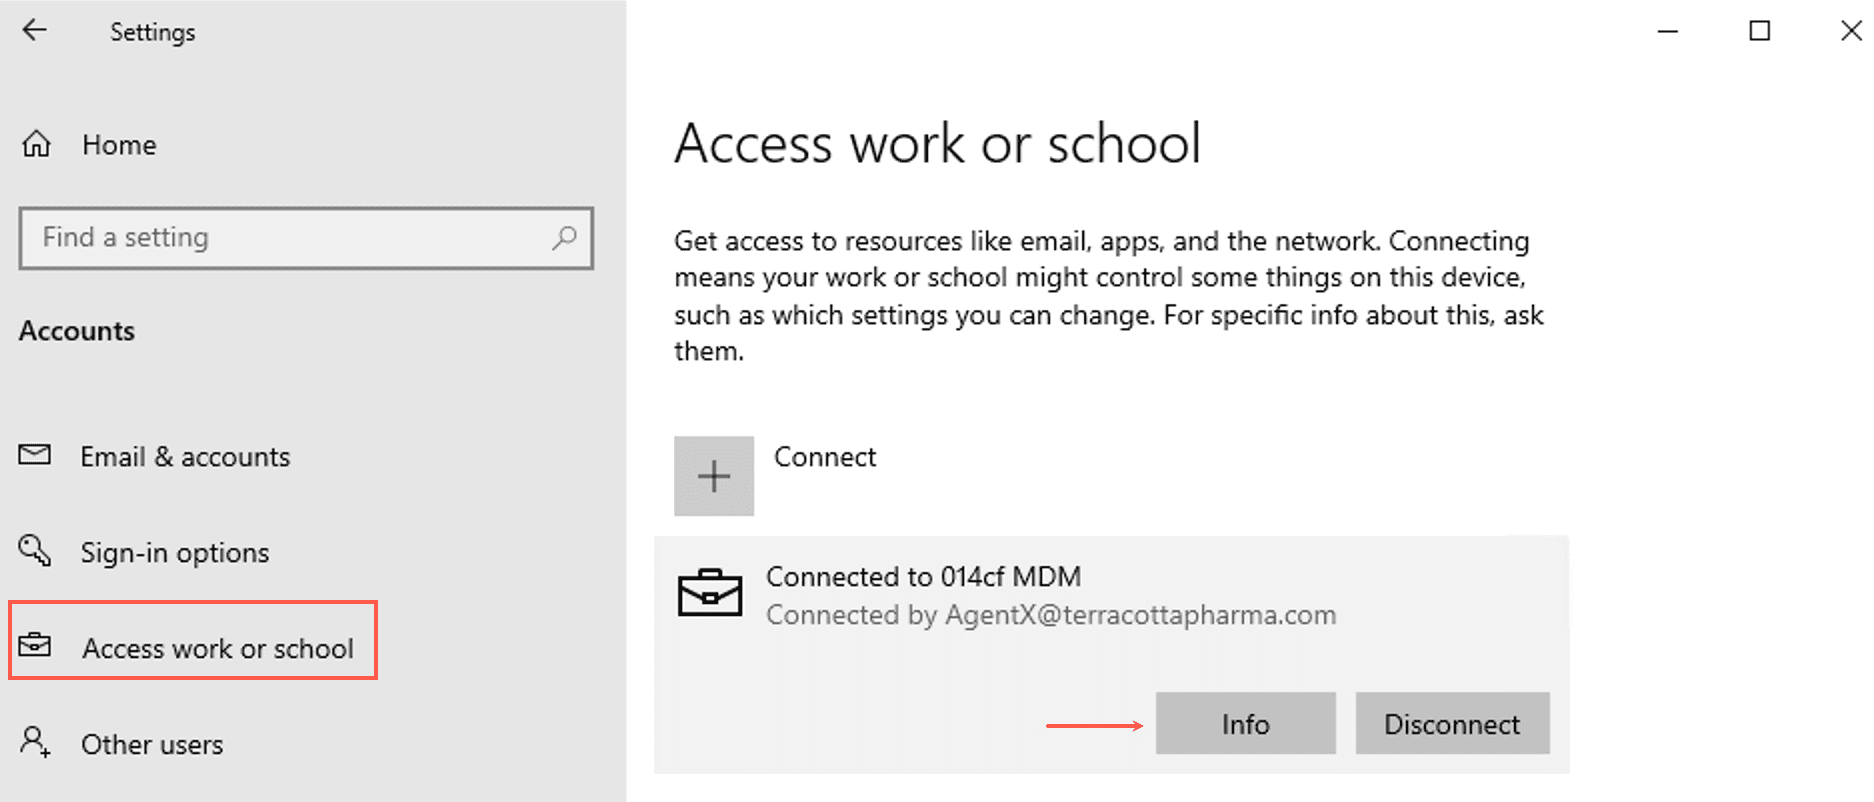
Under Device sync status, click Sync.
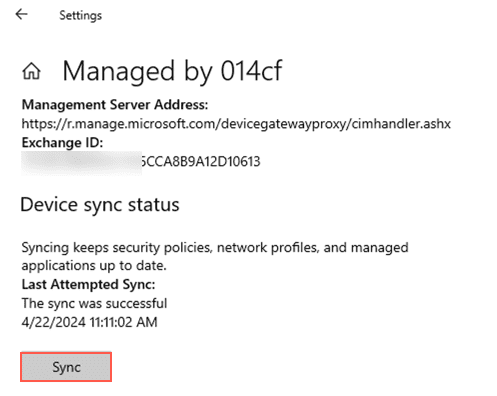
This force synchronizes the installation across all connected Windows workstations immediately without you having to wait for the next scheduled update. Contact your network administrator for information on the scheduled update.
Prerequisites
Windows Server 2016 or later where Domain Controller is configured
Orca
AgentX Client v1.2.0 or later in a shared network that is \hostname\Location. Download it from the Release Notes.
Windows 10 Pro and 11 Pro Workstations
To mass install AgentX Client, you must first enable MSI (Microsoft Installer) logging via group policy. This allows you to generate detailed logs when installing or uninstalling MSI packages on Windows which is helpful for troubleshooting installation issues or analyzing installation behavior.
Important
Enabling MSI logging with Group Policy is a mandatory process for AgentX Client to be installed and work properly.
To enable the MSI logging:
Go to Group Policy Management on the Windows server and click Domains.
Right-click Default Domain Policy and click Edit.
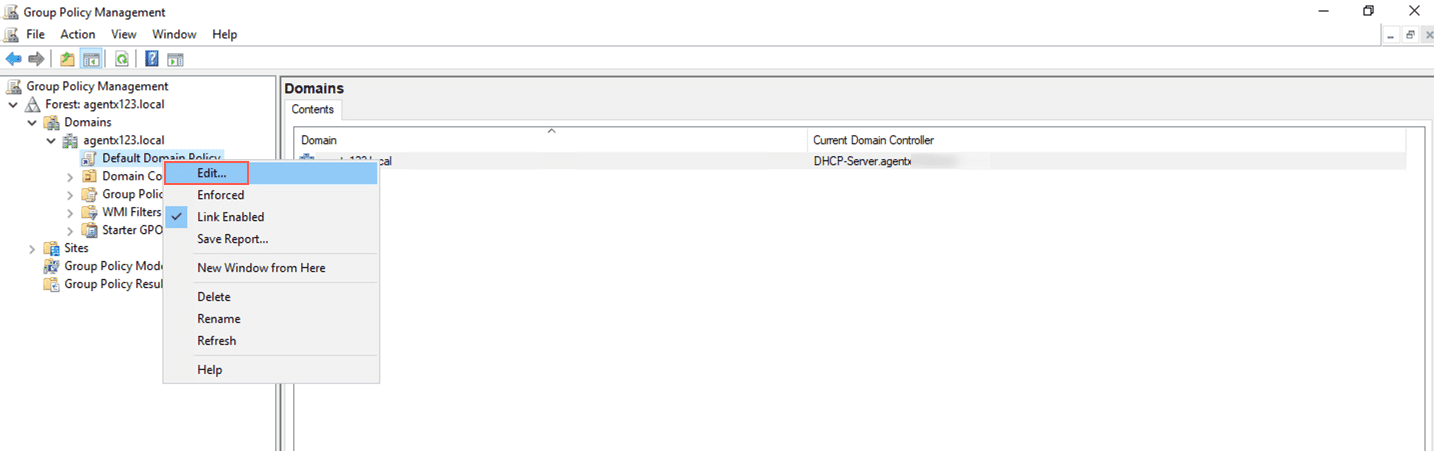
Click Computer Configuration and expand Policies.
Click Administrative Templates and click Windows Components.
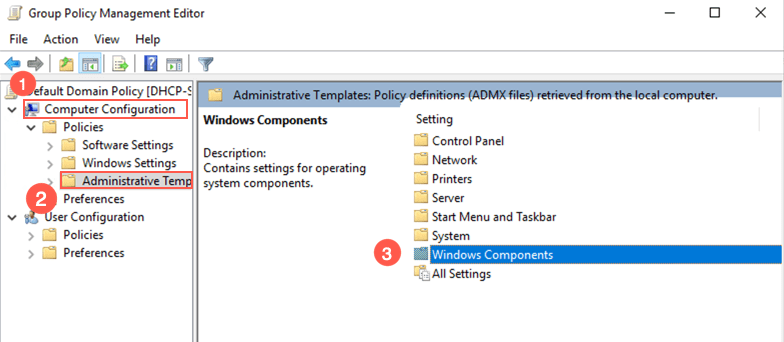
Click Windows Installer.
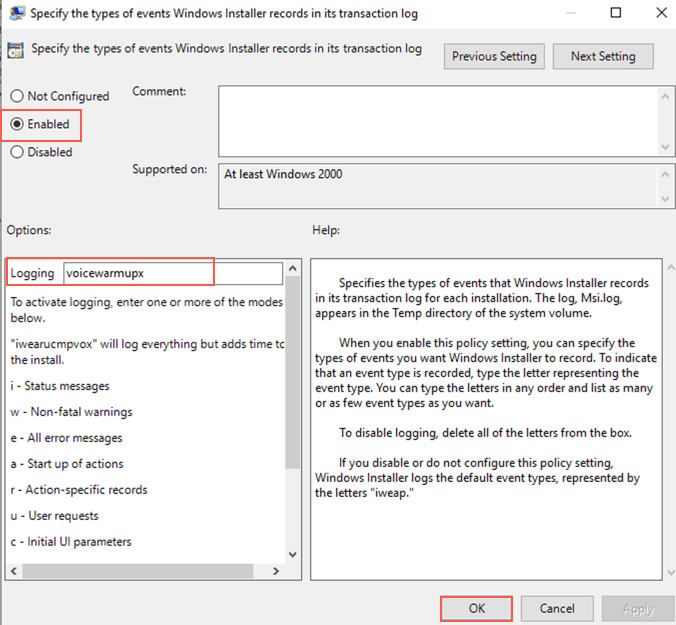
Double-click Specifies the types of events that Windows Installer records in its transaction log for each installation and click Enable.
Under Options, enter voicewarmupx in Logging.
Click Ok.
The next step to mass install AgentX Client is to create a Microsoft Transform File. It is a customized database file that contains changes to the default settings of an MSI package.
To create Microsoft Transform File:
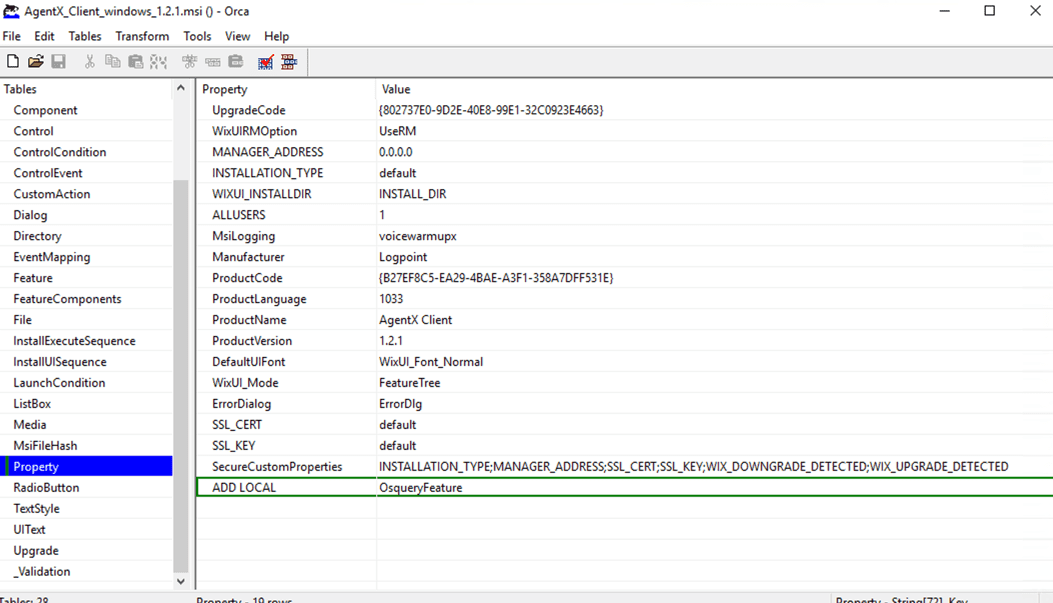
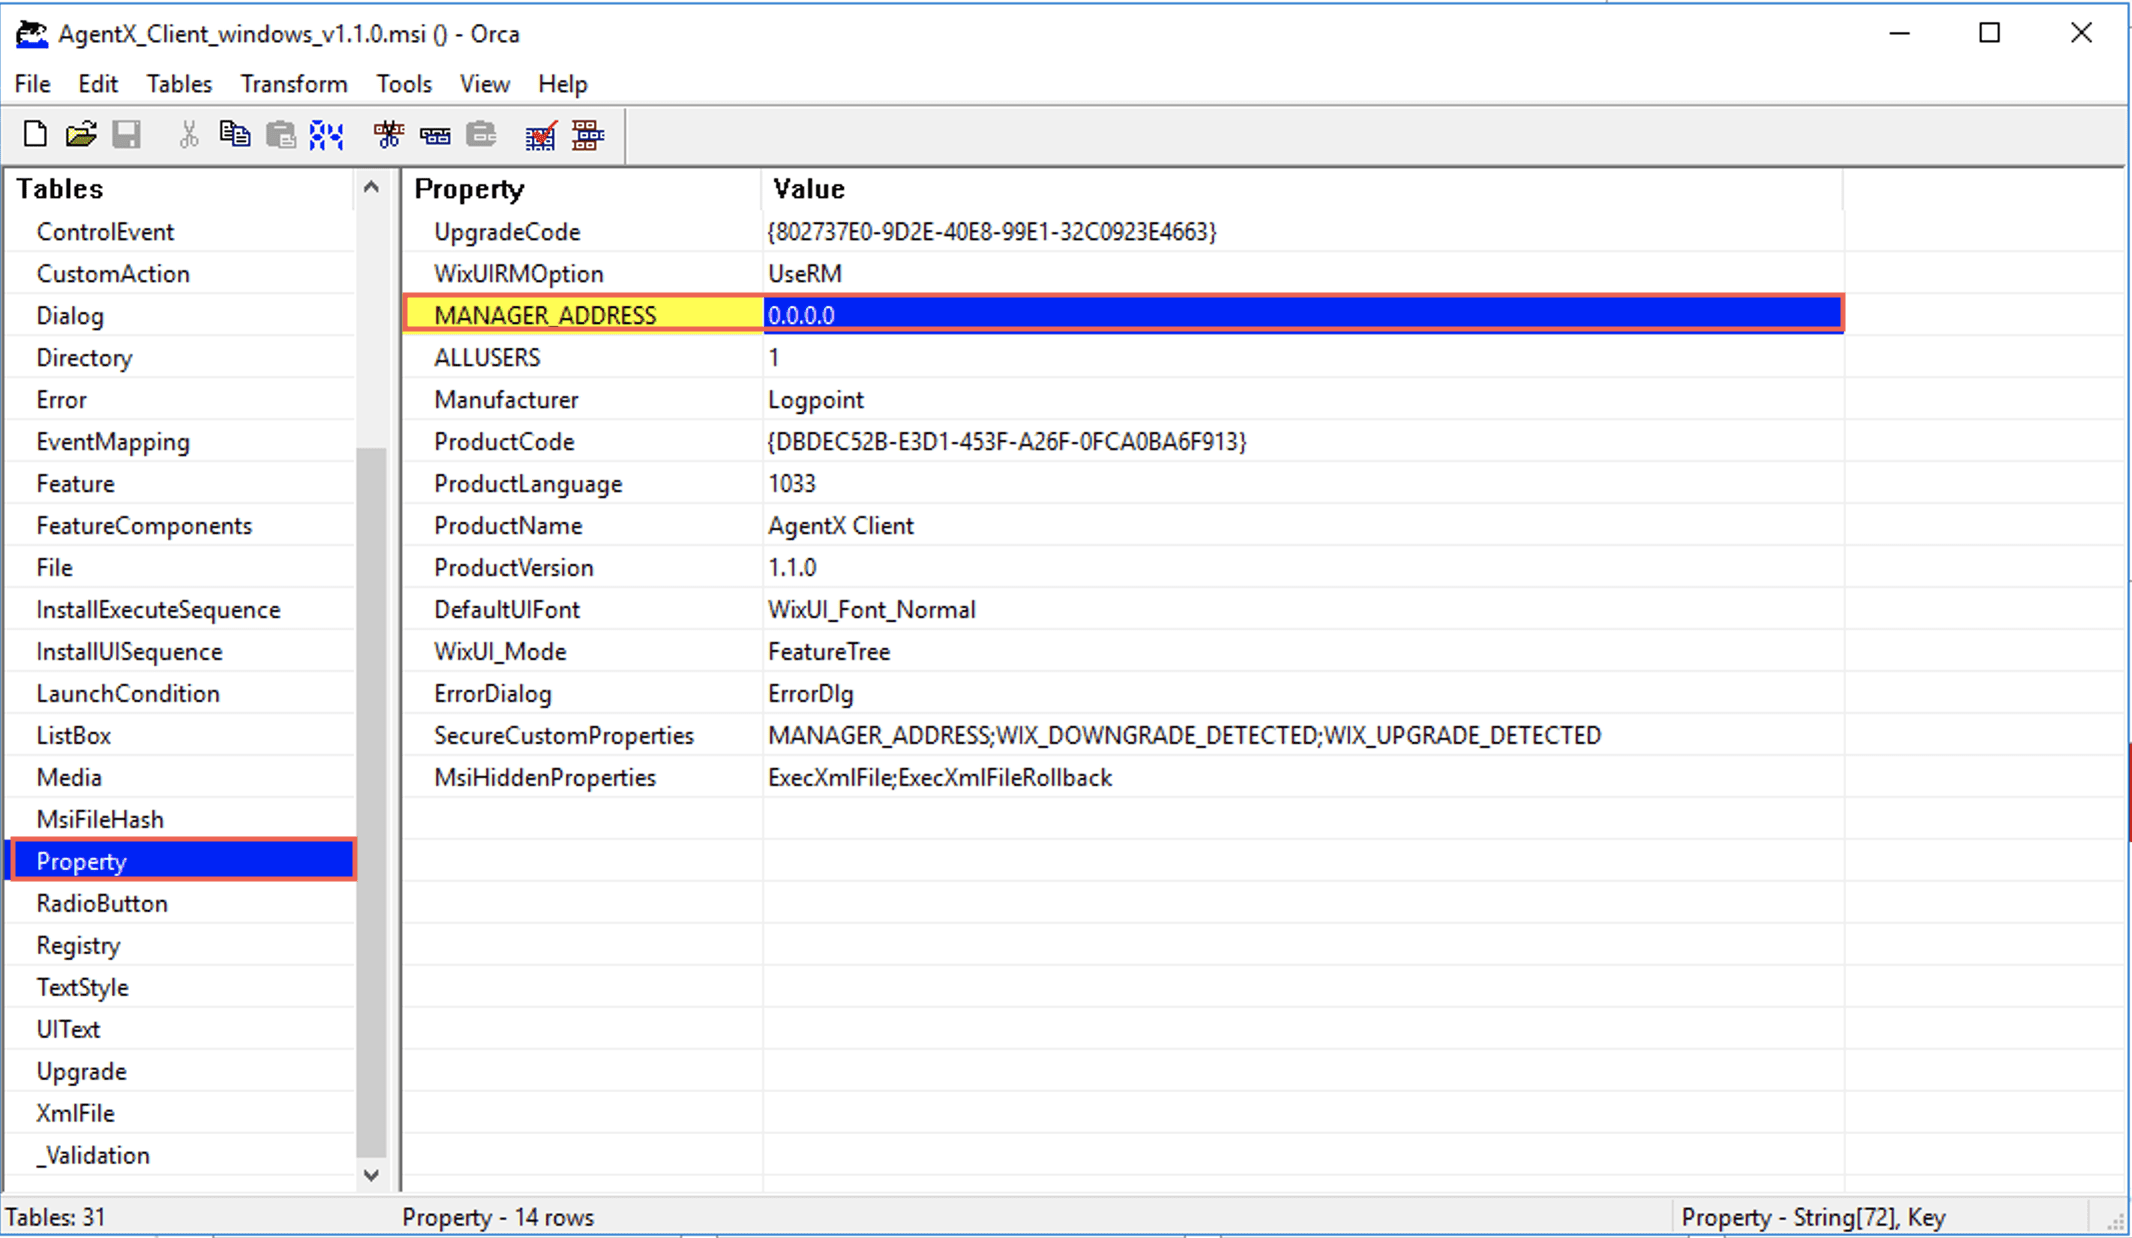
Open the AgentX Client .msi file on Orca.
Click Property and Transform.
Click New Transform from the drop-down.

In MANAGER_ADDRESS, enter the IP address of Logpoint where AgentX Server and AgentX Manager are installed. If you install them on a different Logpoint later, this IP address must be changed so it corresponds to the Logpoint where they are installed.
This installs AgentX Client in the default directory. You can also provide a custom path. However, if the custom path does not exist, the installation fails.
To provide a custom path:
Change the INSTALLATION_TYPE to custom.
Press Ctrl+R on your keyboard. Enter INSTALL_DIR in Property and the custom path in Value.
Press Ctrl+R on your keyboard. Enter ADDLOCAL in Property and OsqueryFeature in Value to install osquery. You can skip this step if you do not want to install osquery.
Click Transform and click Generate Transform.
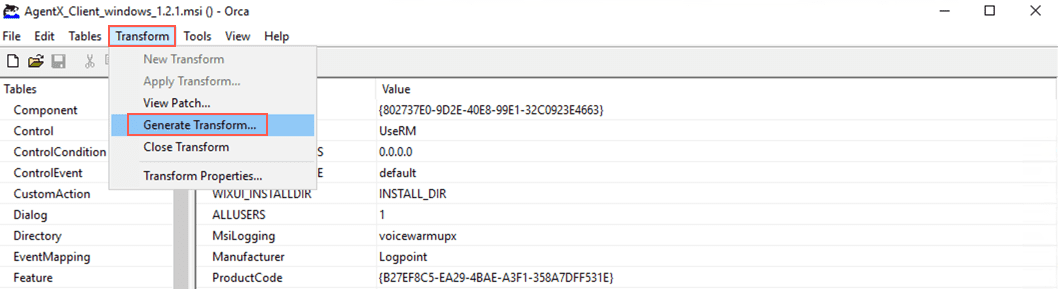
Enter a name for the created .mst file and click Save.
After creating the .mst file, move it to a shared network with AgentX Client to make it accessible to other devices on the network. Then, create a group policy to automate the mass installation process.
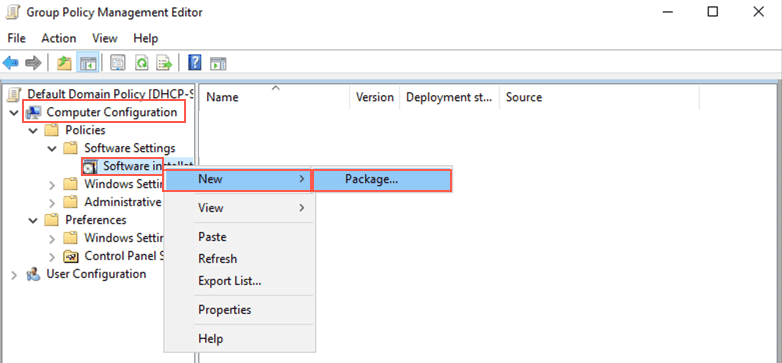
To create a Group Policy:
Go to Group Policy Management on the Windows server and click Domains.
Right-click Default Domain Policy and click Edit.
Click Computer Configuration and expand Policies.
Expand Software Settings and right-click Software Installation.
Click New and click Package.
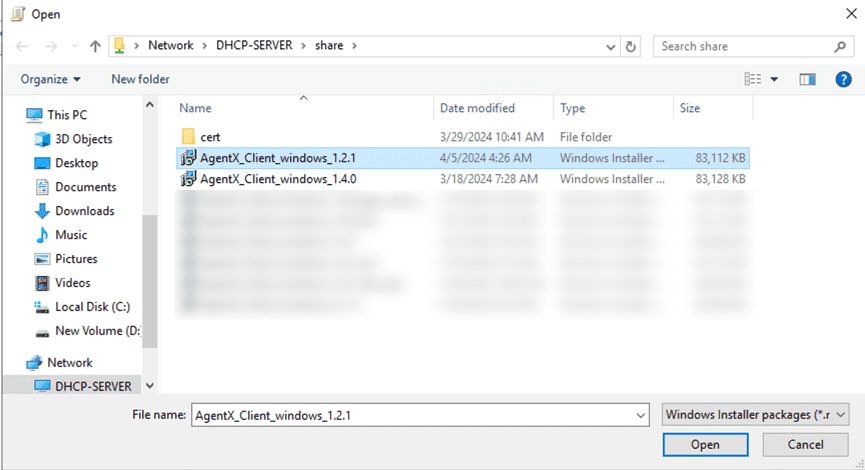
Select the downloaded AgentX Client .msi file and click Open.
Click Advanced and click OK.
Click Modifications and click Add.
Select the previously added .mst file and click Open.
Click OK.
To confirm that installation worked, login to the Windows Server where you need to install AgentX. Open the terminal and enter command gpupdate /force. This command makes sure your changes are reflected immediately without you having to wait for the next scheduled update. Contact your admin for more information.
To change the IP address of Logpoint after the installation:
Create a new .mst file and enter the updated IP address in it.
Go to Group Policy Management on the Windows server and click Domains.
Right-click Default Domain Policy and click Edit.
Click Computer Configuration and expand Policies.
Expand Software Settings and right-click Software Installation.
Click New and click Package.
Select the previously installed .msi file and click Open.
Click Advanced and click OK.
Click Modifications and click Add.
Select the newly created .mst file and click Open.
Click OK.
Download the upgraded .msi file from the Help Center and move it to the shared network.
Go to Group Policy Management on the Windows server and click Domains.
Right-click Default Domain Policy and click Edit.
Click Computer Configuration and expand Policies.
Expand Software Settings and right-click Software Installation.
Click New and click Package.
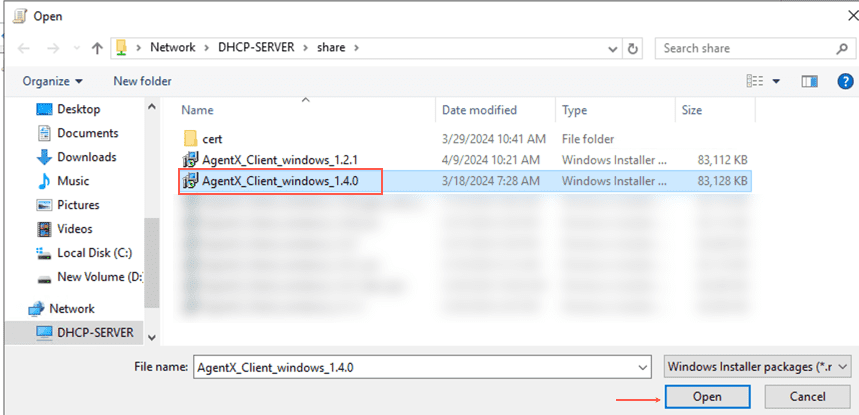
Select the upgraded .msi file and click Open.
Click Advanced and click OK.
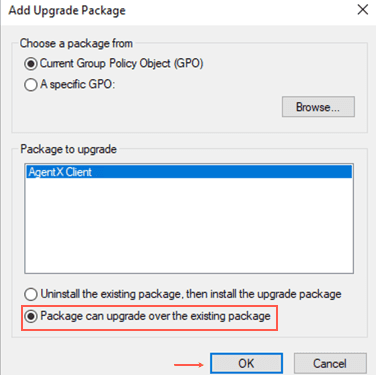
Click Upgrades.
Select and Remove any packages under Packages that this package will upgrade
Click Add.
Select the package to upgrade and click Package can upgrade over the existing package.
Click OK.
Click OK.
To confirm if the upgrade worked, login to the Windows Server where you need to install AgentX. Open the terminal and enter command gpupdate /force. This command makes sure your changes are reflected immediately without you having to wait for the next scheduled update. Contact your admin for more information.
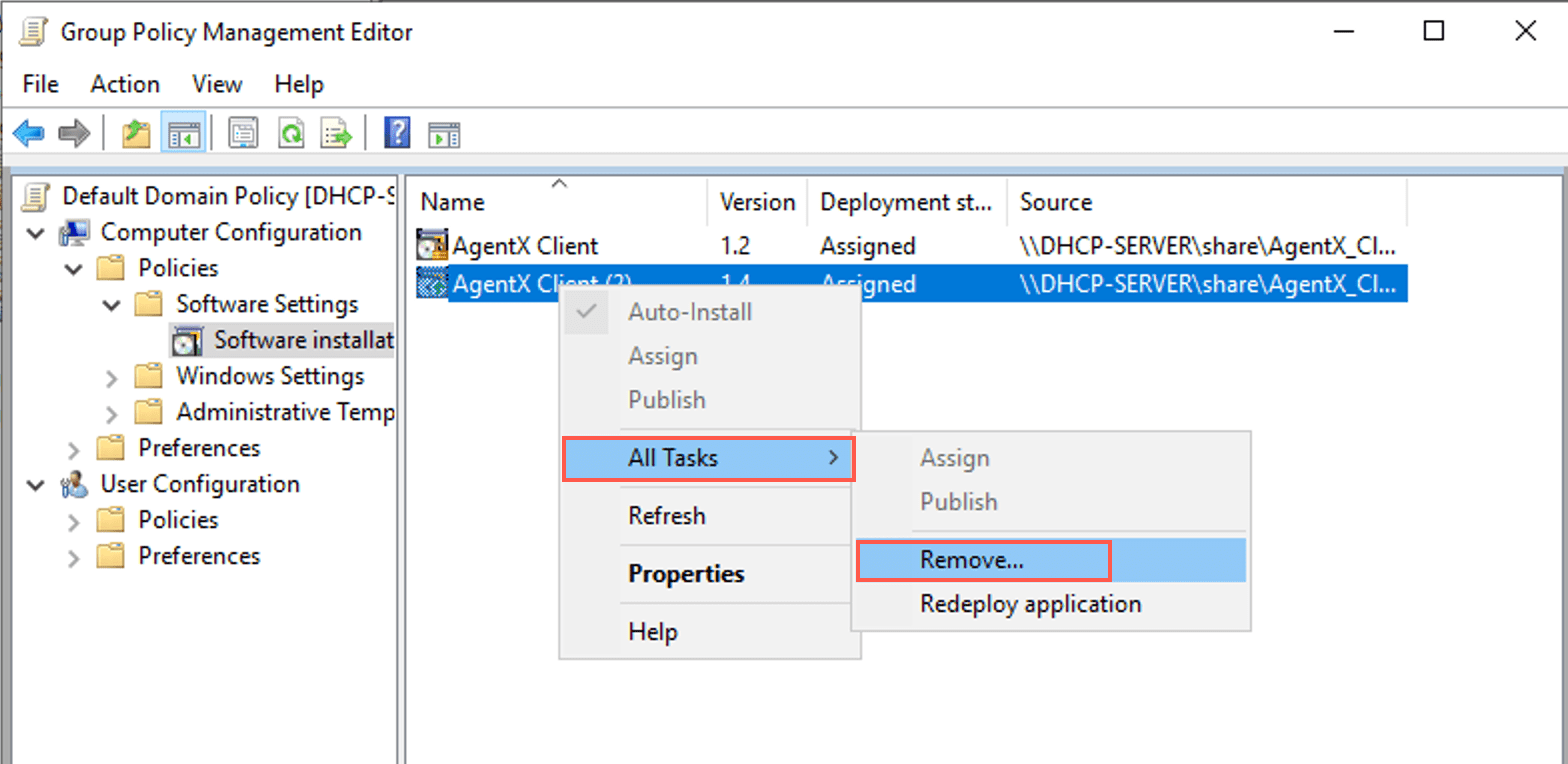
Go to Group Policy Management on the Windows server and click Domains.
Right-click Default Domain Policy and click Edit.
Click Computer Configuration and expand Policies.
Expand Software Settings and right-click Software Installation.
Right-click the file to uninstall and click All Tasks.
Click Remove.
To confirm if the uninstallation worked, login to the Windows Server where you need to install AgentX. Open the terminal and enter command gpupdate /force. This command makes sure your changes are reflected immediately without you having to wait for the next scheduled update. Contact your admin for more information.
Prerequisites
Windows Server 2016 or later where Domain Controller and Microsoft System Center Configuration Manager are configured.
AgentX Client v1.2.0 or later in a shared network that is \hostname\Location. Download it from the Release Notes.
Windows 10 Pro and 11 Pro Workstations
To mass install using SCCM:
Go to the Microsoft Configuration Manager on the Windows server.
Click Software Library and click the Application Management drop-down.
Right-click Applications and click Create Application.
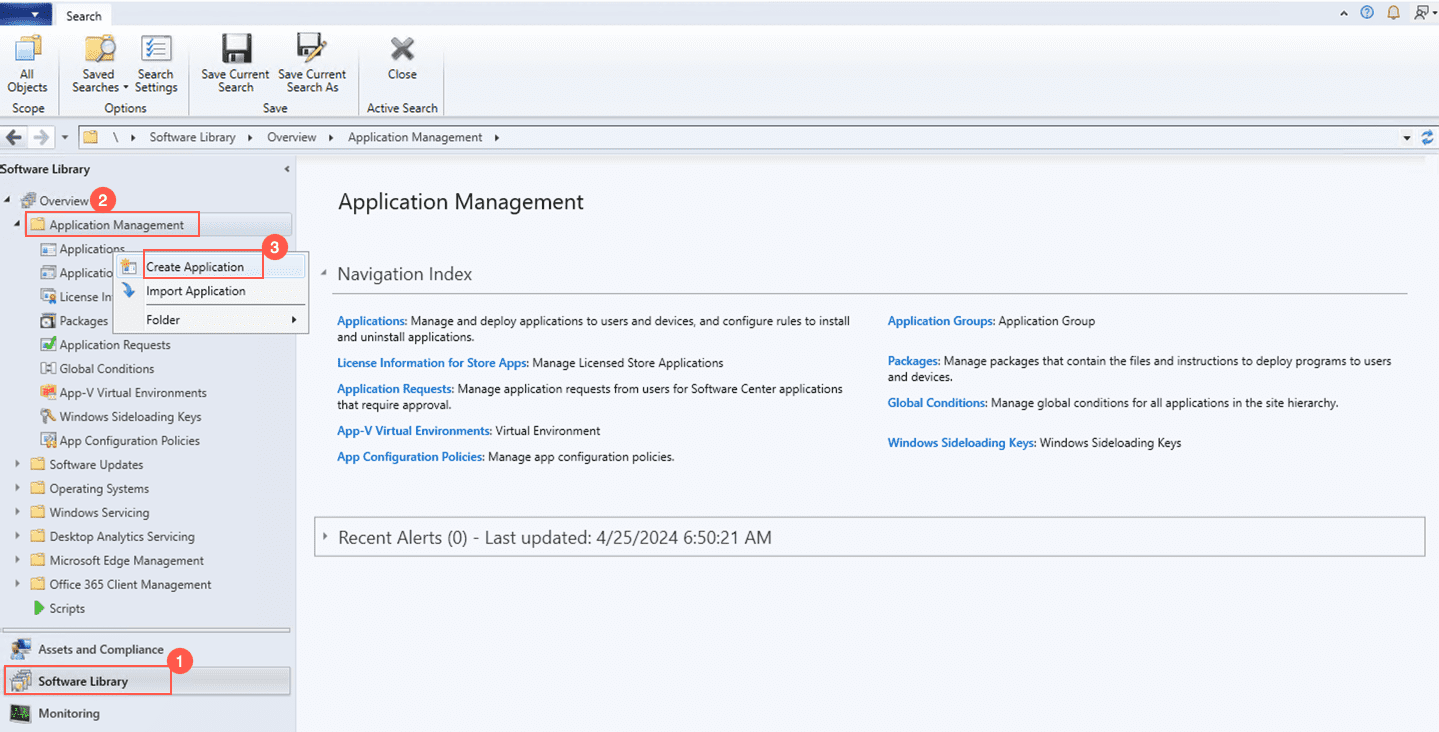
Browse and Open the AgentX Client .msi.
Click Next.
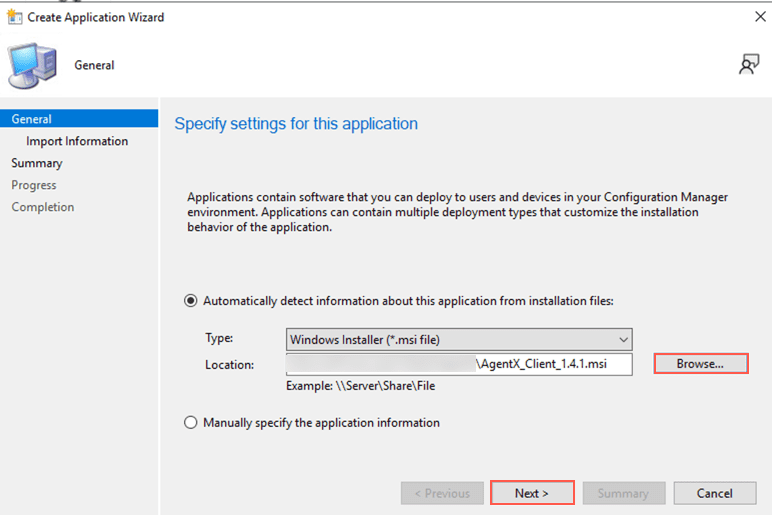
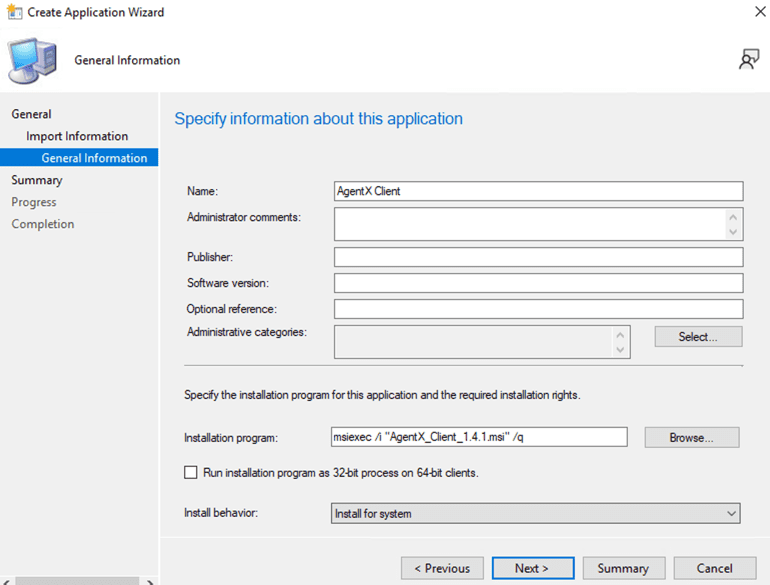
Click General Information and enter a Name.
You can find the command msiexec /i “AgentX_Client_1.4.1.msi” /q in Installation Program. This installs only OSSEC in the default location.
To install osquery along with AgentX Client, enter the following command:
* msiexec /i "AgentX_Client_windows_1.4.1.msi" ADDLOCAL=OsqueryFeature MANAGER_ADDRESS=x.x.x.x /qn
Here, MANAGER_ADDRESS is the IP address of Logpoint where AgentX Server and AgentX Manager are installed.
To install AgentX Client and osquery in a custom path, enter the following command:
* msiexec /i "AgentX_Client_windows_1.4.1.msi" ADDLOCAL=OsqueryFeature MANAGER_ADDRESS=x.xx.x.x INSTALLATION_TYPE=custom INSTALL_DIR=“D:\AgentX_Client" /qn
Here, specify the location to install AgentX Client and osquery in INSTALL_DIR. Also, if the custom path does not exist, the installation fails.
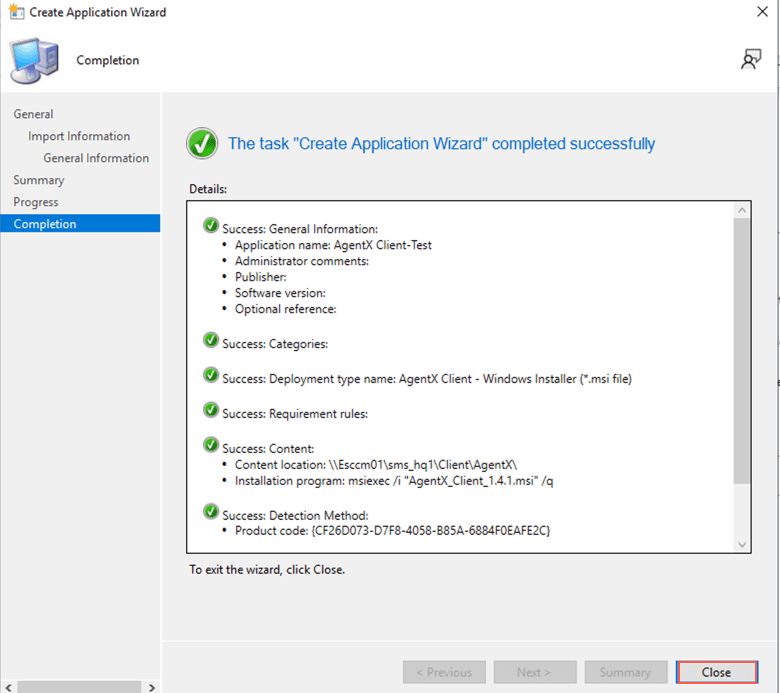
Click Next.
Click Next.
Click Close.
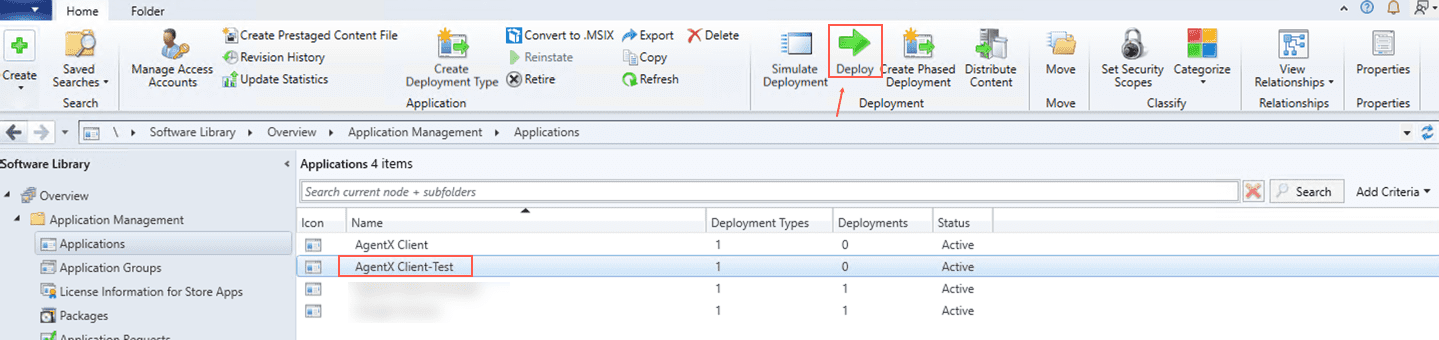
Go back to the Microsoft Configuration Manager where you will find the previously selected .msi file.
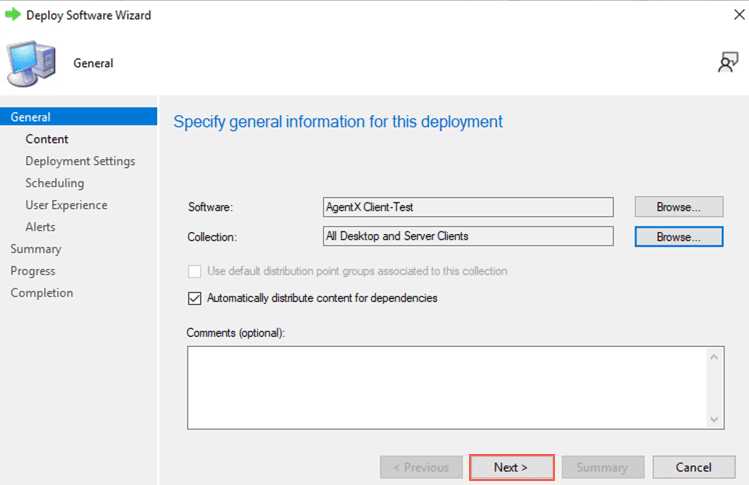
Select the .msi file and click Deploy.
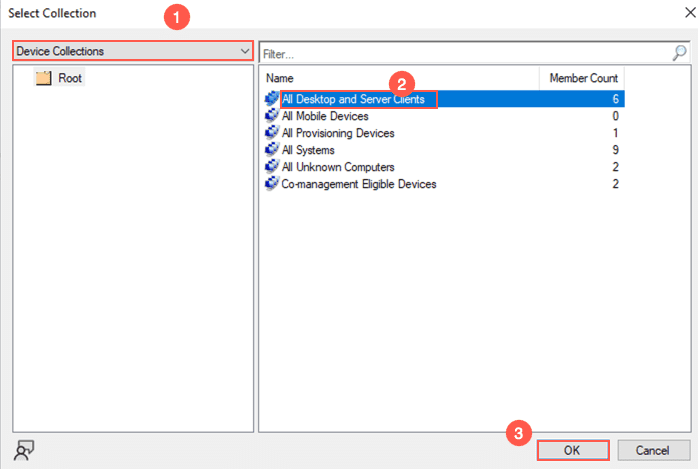
In Collection, click Browse.
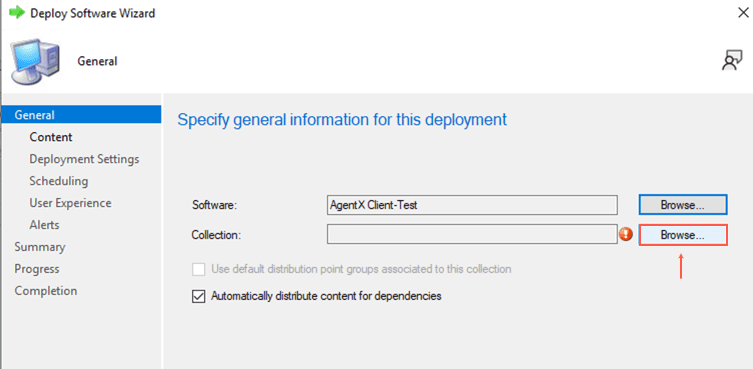
In the User-Collections drop-down, select Device Collections.
Select All Desktop and Server Clients and click OK.
Click Next.
Click the Add drop-down and click Distribution Point.
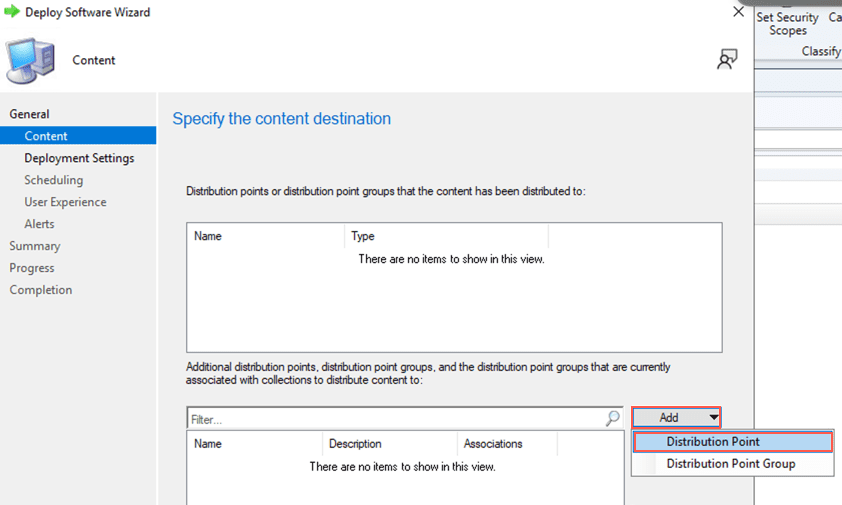
Select your distribution point and click OK.
Click Next.
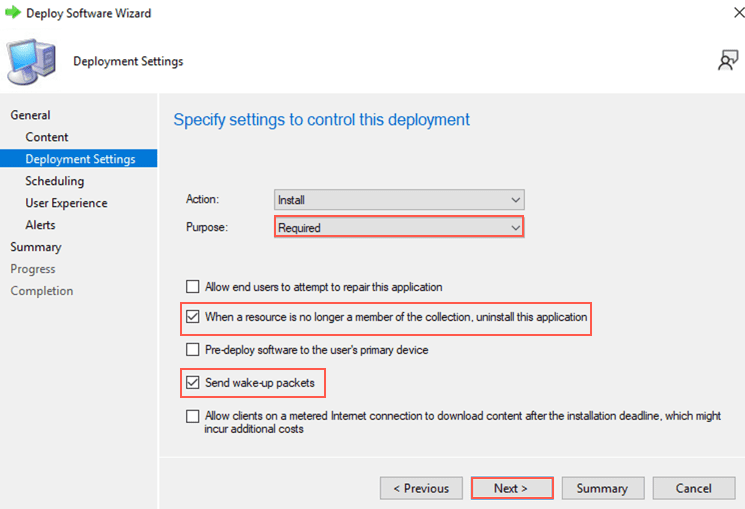
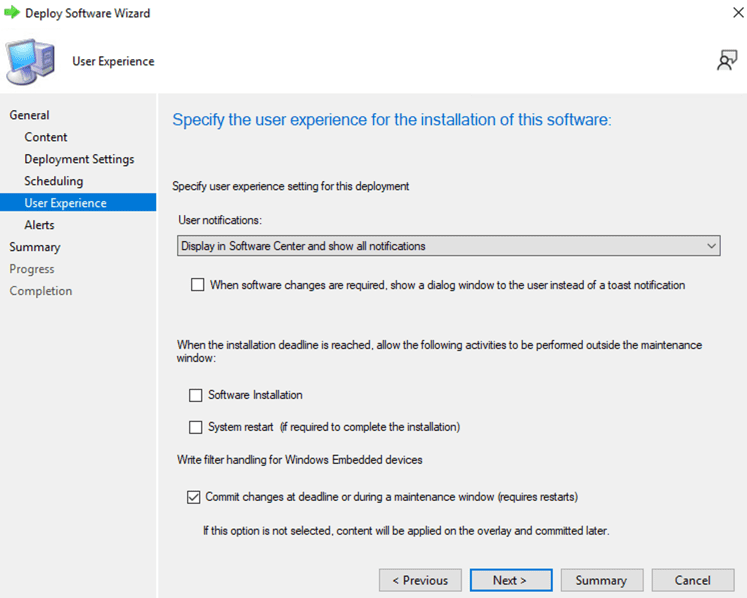
In the Purpose drop-down, select Required. This allows AgentX to install silently in the background.
Important
Selecting Purpose: Available can cause command prompt to appear during installation, potentially confusing users or disrupting their workflow.
Select When a resource is no longer a member of the collection, uninstall this application and Send wake-up packets.
Click Next.
Select an Installation deadline and click Next.

Click Next.
Click Next.
Click Next.
Click Next.
Click Close.
To ensure that the above installation is applied to the network immediately:
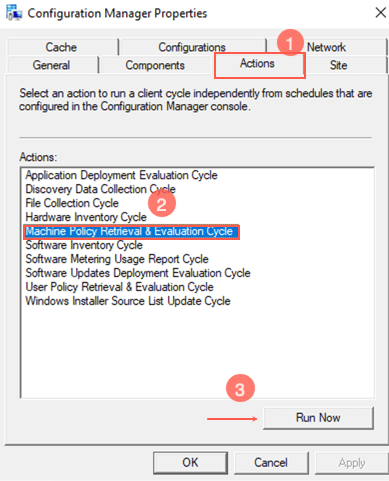
Go to your Windows workstation’s control panel.
Go to Configuration Manager and click Actions.
Select Machine Policy Retrieval & Evaluation Cycle and click Run Now.
Click OK.
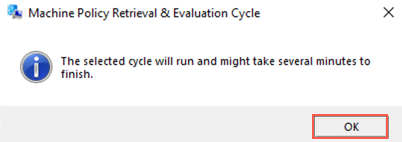
This force synchronizes the installation across all connected Windows workstations immediately without you having to wait for the next scheduled update. Contact your network administrator for information on the scheduled update.
Download the AgentX file from the Release Notes.
Using a Linux terminal, go to the location of the downloaded AgentX Client file.
Enter following command to unzip the installer: tar -xvf AgentX_Client_debian.tar.gz.
Enter the command: sudo ./install.sh.
Enter the IP address of Logpoint where AgentX Server and AgentX Manager are installed. If you install them on a different Logpoint later, you must update this IP address accordingly.
Enter y in the confirmation message to install osquery. The terminal displays Successfully installed AgentX after the installation.
AgentX Client is installed in /opt/logpoint/ossec and osquery in /opt/logpoint/osquery.
If you use the above command, OSSEC and osquery are configured by default during the installation. You can also use a custom configuration file for osquery by using the following command to install AgentX Client:
./install.sh MANAGER_ADDRESS=XX.XX.XX.XX OSQUERY_INSTALL=Y CUSTOM_OSQUERY_CONF=/path/conf VALIDATE_CONF=Y
If you’re using custom Certificates, then you must use the following command to install AgentX Client:
./install.sh MANAGER_ADDRESS=XX.XX.XX.XX OSQUERY_INSTALL=y SSL_CERT=/opt/new/sslagent_new.cert SSL_KEY=/opt/new/sslagent_new.key
To update Logpoint IP address after the installation:
Enter the following command in the Linux terminal:
/opt/logpoint/ossec/etc/ossec.conf
In address, enter the Logpoint IP address.
Restart the agent by entering the following command:
systemctl restart wazuh-agent
You must first remove AgentX device configuration from Logpoint and then uninstall it.
To remove AgentX device configurations:
Go to Settings >> Configuration from the navigation bar and click Devices.
Click the Add collectors/fetchers ( ) icon under Actions of the localhost device.
Click AgentX.
Click the Delete ( ) icon under Actions.
To uninstall AgentX:
Go to Settings >> System Settings from the navigation bar and click Applications.
Click the Uninstall () icon in Actions of AgentX.
You can uninstall AgentX Client in Windows either from the command line or from the User Interface. However, you must have administrative privileges.
To uninstall AgentX Client from the command line:
Go to the command line and enter the following:
msiexec /x AgentX_Client_windows_version.msi
To uninstall AgentX Client from the User Interface:
Go to the Windows control panel and click Uninstall a program.
Select AgentX_Client_windows and click Uninstall.
To remove AgentX and osquery:
Enter the following command in the Linux terminal:
sudo apt-get remove --purge wazuh-agent
To remove osquery:
Enter the following commands in the Linux terminal:
sudo apt-get remove --purge osquery
If some files are not removed, then you must remove them manually using the following command:
rm -rf /opt/logpoint/osquery